

The greatness of WordPress comes from its highly customizable nature – almost everything can be tweaked, edited, adjusted or replaced without any need to directly dive into the core files and modify existing code. This makes adding and maintaining tweaks a lot easier than having to re-apply them to the original files after every WordPress or extension update.
By design, both themes and plugins support the same flexible nature as WordPress, as long as their authors coded them properly and with customizability in mind.
Mini-plugins are not something specific in the world of WordPress. What we call mini-plugins are simply small (regular) plugins with very limited functionality, designed to add or perform one or a limited number of features that don’t find a place in any other code file.
Mini-plugins are very useful at applying small tweaks or little bits of code on the site. They’re handy when you’re not already using a child theme and prefer not to create one, as this could complicate configuration or updates, or when the customized code is not fit to be placed in a theme, such as when it would need to be applied at a time before the theme itself is initialized.
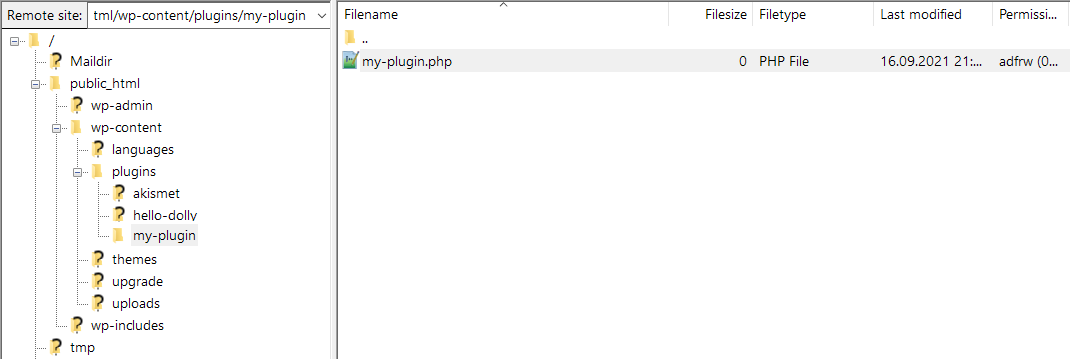
Creating a mini-plugin is very simple. The minimum required code for a plugin is a file named accordingly placed in WordPress’ wp-content/plugins/ folder. If you intend or expect your plugin to ever contain more than one file, it would be best to start it in its own sub-folder, titled the same as the main file – for example wp-content/plugins/my-plugin/my-plugin.php. You can name these anything, just keep them in sync.
The main plugin file needs to have a specific header – as described here – with the absolute minimum required content below:
<?php
/**
* Plugin Name: My Plugin
* Plugin URI: https://www.cryoutcreations.eu/wordpress-tutorials/customize-wordpress-using-mini-plugin
* Description: My first custom mini plugin
* Version: 0.1
* Author: Just Me
*/

/* add custom code below */
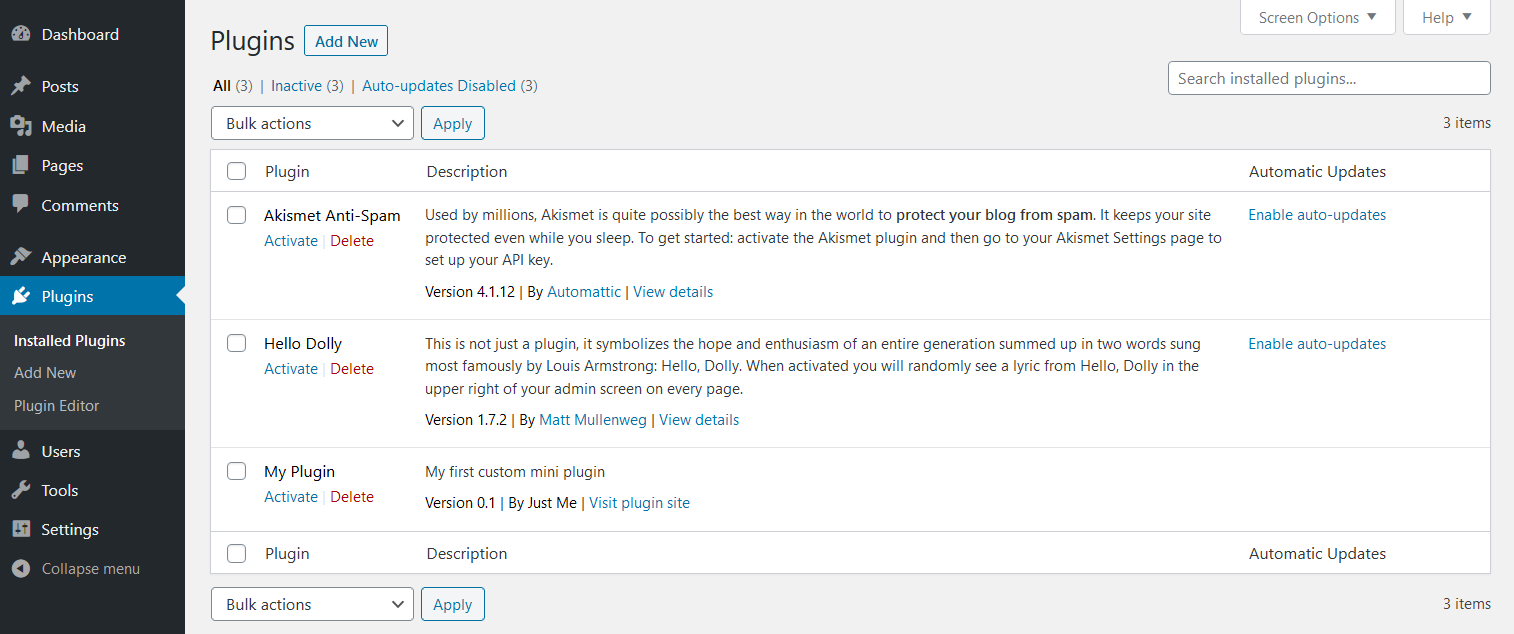
Add the header and the custom code, then save the file and check out the plugins list in the dashboard. There should now be a new “My Plugin” plugin in the list which you can activate.
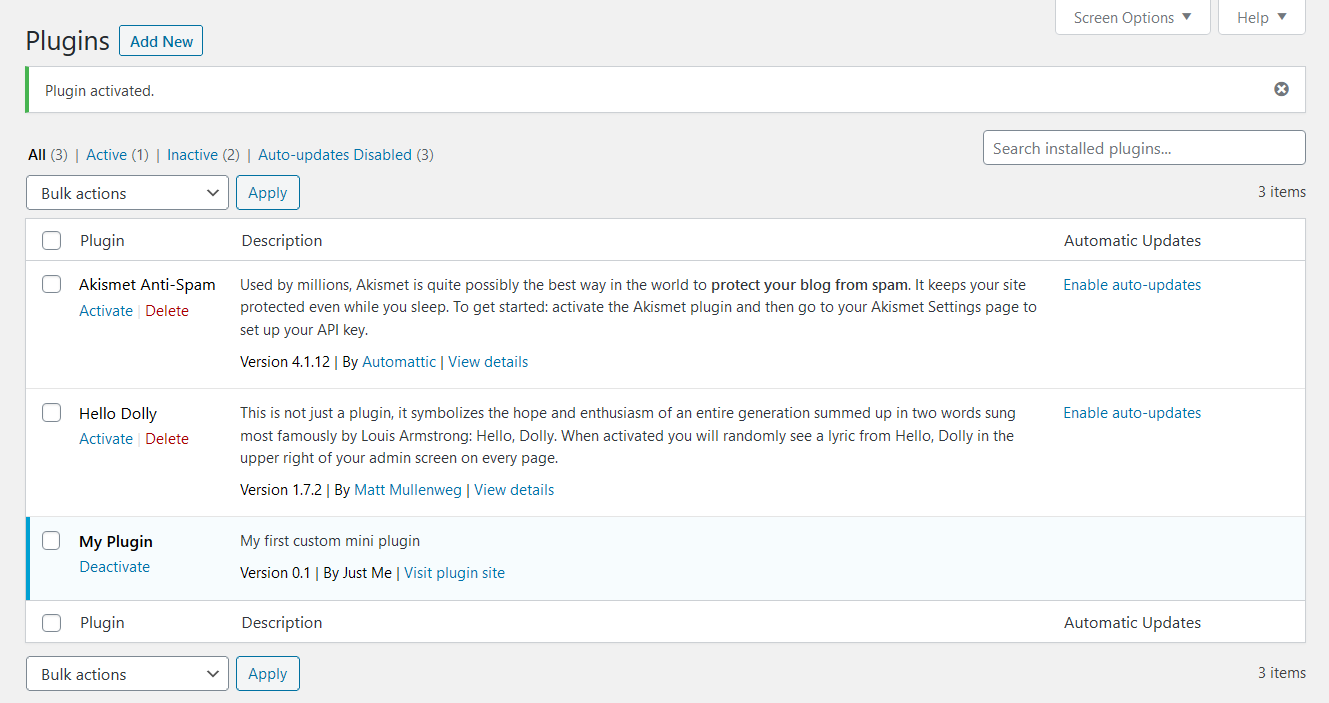
Once activated, if nothing in the code is broken the plugin should be active and already taking effect on the site.
You can add further code or edit the existing one – note that having errors in the code can break your site so try this first on a dev copy not the live site.
Download the example mini-plugin.
For complete in-depth info about plugins read the official WordPress.org documentation.