WordPress’ translations system is based on a direct strings replacing system, with the translation file keeping track of where the original string is (used for record tracking only), what its exact value (text) is – the most important aspect of translations – and what it should be replaced with.
To optimize the process of translating texts in the code, WordPress uses specific translation files (the .po and .mo) for each extension (plugin or theme) and for each language.
With time the original extension – be it a plugin or a theme – might add, remove, adjust or replace existing translatable texts. Such changes are not detected on-the-fly as that would be a high resource drain if it would be performed on every page render (or even periodically at predefined intervals). Instead WordPress will continue to use the existing po/mo files to keep track of and decide texts translations. When the translation files and the actual extension code get out of sync some existing translations can become useless (because their texts are no longer used) while other texts may start showing up non-translated (because they didn’t use to exist so they are not included in the po/mo files).
At this step the translation files need to be updated to account for texts changes – and in some cases new translations need to be made for the new texts. For this task we still recommend the Loco Translate plugin which simplifies the process to a few steps that can be done directly from WordPress’ dashboard.
General
After installing and activating the plugin, we’ll find its configuration sections under the Loco Translate menu in the dashboard:
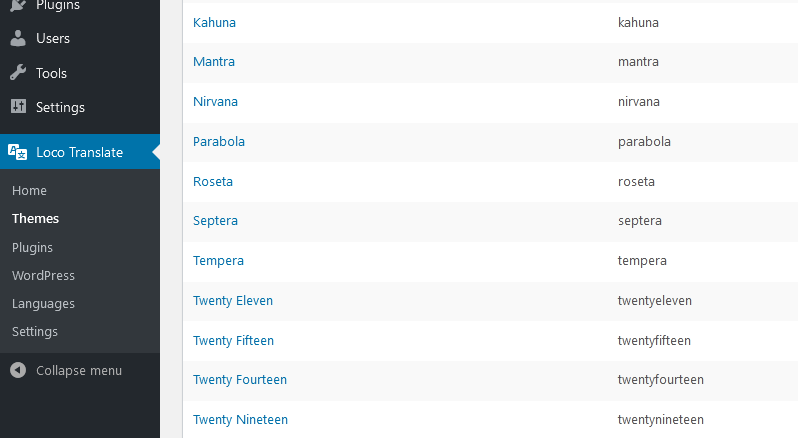
Navigating to these sections will reveal the sections the plugin supports. The first three work basically the same but cover different aspects of the site:
- Themes, as its name suggests, presents and controls translations for themes
- Plugins, obviously, presents and controls translations for plugins
- WordPress is where we’ll find WordPress’ own translations handling area
- Languages lets us see and mage the site’s languages list (those configured in WordPress’ general options)
- Settings lets us control some of the plugin’s own configuration options
Navigating to the Themes section will present us with the list of all the currently installed themes. Choose the one that needs editing or updating to proceed – in my example I will use Roseta.
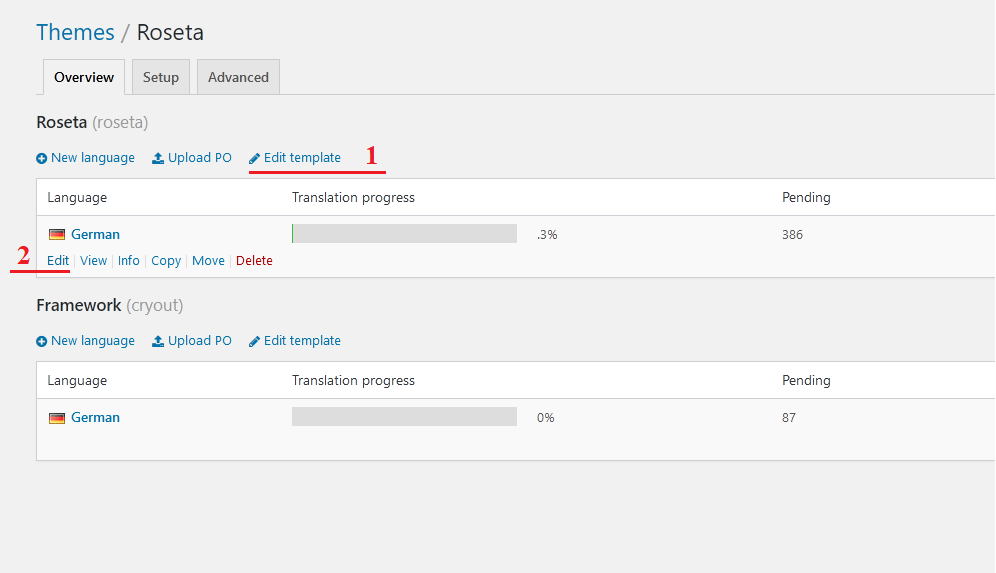
On the next screen Loco presents the extension’s available text domains and languages. Generally extensions (themes, plugins) only have one textdomain, but more complex one can have multiple textdomains if they use frameworks or libraries.
Notice the underlined Edit template [1] and Edit (translation) [2] links (visible on hover) which we’ll explain below.
The same as with the initial translation process, text strings can be included in any of the available text domains, so if you don’t remember or don’t know where the string you want to translate is located you’ll need to search through all the textdomains.
Updating the translation template
Some extensions may include a .pot file which is like a blank template for the actual .po/.mo translations. Loco will use this .pot file when available as a basis for translations processing. However the file may not be present in some extensions or may not always be up to date with the actual code in case the author(s) forgot to update it with every new release.
To correct the desynchronization Loco lets us update the template file by scanning the source code of the extension for all translatable strings. This is a resource-intensive operation so it isn’t done automatically. This is where the Edit template link marked with [1] in screenshot above comes in. Click it from the extensions general screen to proceed to the next screen:
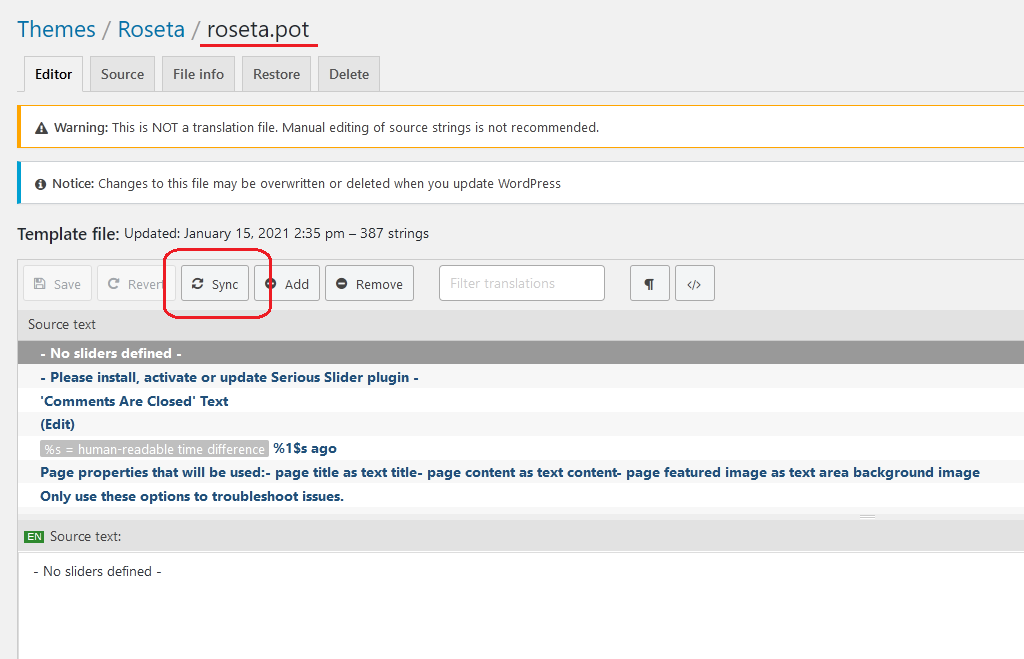
Here we’re presented with some meta information about the template .pot file (last update date and time), number of translatable strings and a list of all the strings below. This is NOT the translation screen and you should never attempt to use it to translate texts – in fact you won’t find a translation input field in the interface, just more fields for meta information (context, comments).
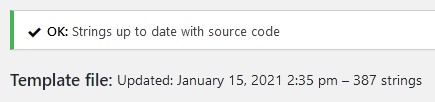
However, this screen provides us with the Sync button (circled above) that performs the task of scanning the extension source code for translatable strings and updates the template file with those strings. When the process is complete we’re provided with either confirmation that everything is up to date:
or a status of the changes:
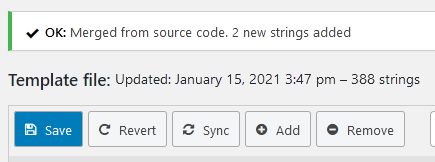
If changes were found, don’t forget to also click the Save button to commit the changes to the template (.pot) file.
Remember to repeat this Sync and Save process for each textdomain listed on the previous screen.
If you believe or know the extension includes some large code files or you notice translation strings missing or failing to update (or simply not working), it may be due to Loco simply skipping some code files because they are larger than the configured file size limit, making any texts they contain to also be skipped from translations. This limit is configurable from Loco’s own options under its Settings section:
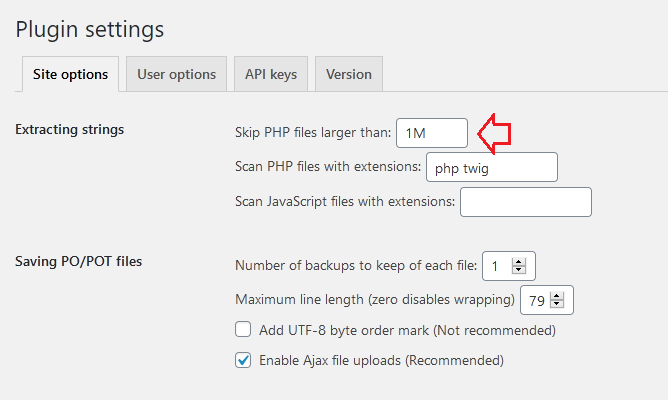
While the default file size limit of 100K may be sufficient for most cases, some larger extensions and even WordPress core files may surpass that limit. In practice I observed that setting a limit of 1M (Megabyte) worked in all my usage cases.
Updating the translation files
Once we have the templates up to date we’ll also need to synchronize the translation files with the template. This is done by navigating to the translations screen – indicated by the Edit [2] link in the second image in this tutorial.
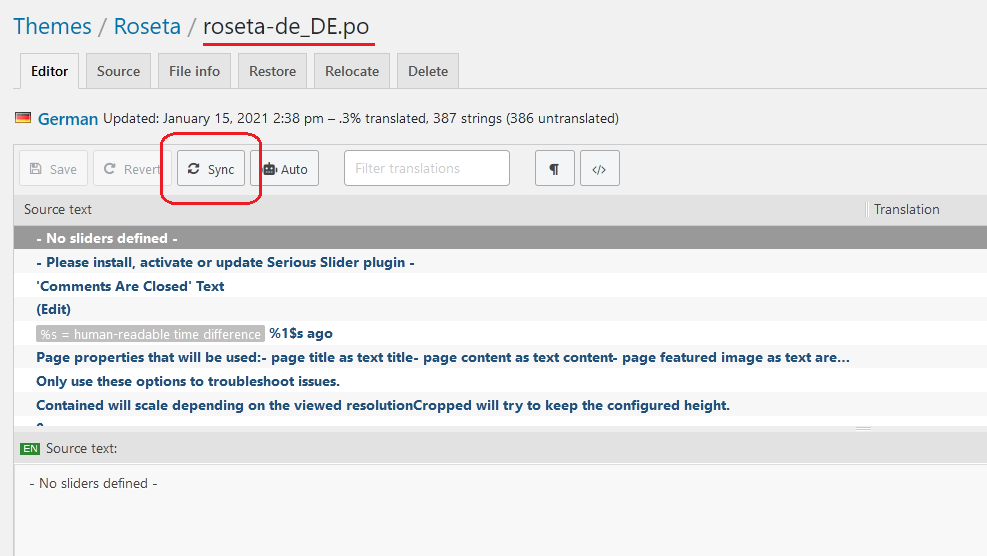
This is the regular screen we’re accustomed to and where we manipulate all translations from with Loco.
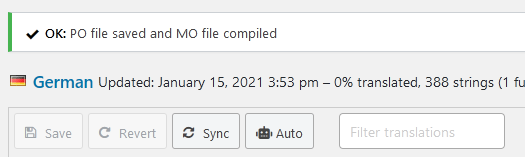
Here we’ll find a similar Sync button, which this time handles the synchronization between the template .pot file and actual translations po/mo files. Using it will result in one of the two results – everything is up to date:

or translation file gets updated with changes from the template:
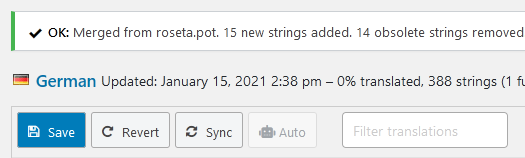
In the latter case again remember to click Save to commit the changes to the translation file. We’ll be provided a confirmation of the changes:
Repeat the Sync and Save steps for all the languages that need updating/maintaining.
When both steps of the translations are synchronized with the code and everything is done we can then proceed to search for and update (or add) any missing or malfunctioning translations as presented in the translations tutorial.